Showing posts with label card. Show all posts

Tuesday, July 23, 2013

Convention Swap--Wildflower Meadow Card


I've wanted to make a card using the negative of a punched card stock. But then, it seemed too simple just with the punched negative. Slowly, I started to add elements like the Wildflower Meadow Impressions Folder, buttons for the centers, and a banner greeting. Clean and simple.

*TIP: To get the larger rounded corners, insert the corners into the circle punches. 

{Project Details}
Itty Bitty Banners
Itty Bitty Banners 132022Price$15.95

Very Vanilla 8-1/2X11 Card Stock
Very Vanilla 8-1/2X11 Card Stock 101650Price$8.50

Coastal Cabana 8-1/2" x 11" Cardstock
Coastal Cabana 8-1/2" X 11" Cardstock 131297Price$6.95
Wildflower Meadow Textured Impressions Embossing Folder
Wildflower Meadow Textured Impressions Embossing Folder 129376Price$7.95

Pansy Punch
Pansy Punch 130698
Price$15.95

Bitty Banners Framelits Die
Bitty Banners Framelits Die 129267
Price$14.95

Big Shot Die-Cut Machine
Big Shot Die-Cut Machine 113439Price$99.95

Naturals Designer Buttons
Naturals Designer Buttons 127554
Price$4.95
To order on-line 24/7 click here.


Monday, March 11, 2013

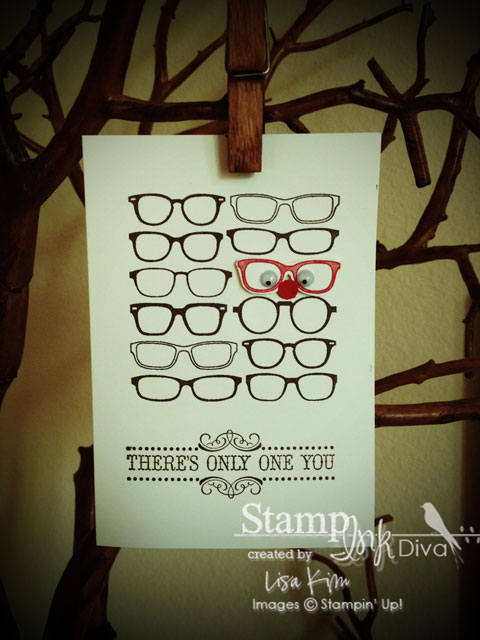
Spec-tacular Birthday Card

When I had to wear glasses, it wasn't so "cool". But now, it's trendy. (on or off your face).

This card was a take on one that was made by another demonstrator, Linda Callahan. I wanted to make a birthday card for a spec-tacular boy and this was just perfect--simple, hip, and a bit of humor.

{Project Details}


Sale-a-bration set (For every $50 purchase before tax and shipping, choose one set free from the Sale-a-Bration catalog.


To order on-line 24/7 click here.


Tuesday, January 29, 2013

Mirror Monday: Thank You Zumba

On my quest to get fit, I found a new love for Zumba. Not only have I found a new passion, I have been blessed with many friends who have become like family through this journey.

A small group of these amazing people surprised me with a luncheon and showered me with gifts galore. So how can I show them my gratitude?

Yes, homemade thank you cards.

They are a very small token of  my gratitude but I hope they feel the LOVE that was put into it.

Great news...I just got my license to teach Zumba fitness. I can't wait to continue this new journey and eventually use this licensing to teach others and share this love. Sound familiar? Yes, I certainly LOVE what I do and feel so happy to SHARE them with others!

{Project Details} card designed from Spring Catalog pg. 3.


-->

Thursday, January 17, 2013

Hey There Friend


Would you like to see what you can make with the Welcome Kit from Paper Pumpkin? As a leadership attendee, I was lucky enough to receive this kit.

This welcome kit included:

  • clear block
  • clear mount stamps
  • materials for project (all pre-cut)
Took me less than 30 mins (maybe 5 min.) to complete 4 cards. 

Then, I got to assemble the trial kit.


  • Afraid of commitment? Too much pun'kin for you to handle? You can try me and I'll visit just once. (But I know you'll want me to come back every month.)
  • • I'm $16.95 (plus shipping).
  • • I've got all the stamps, ink, paper, and accessories to create beautiful projects.
  • • I'm all cut, measured, and ready—with instructions included. (Don't worry, I'm easy.)
For FAQ, click on the link.


To order on-line 24/7 click here.


Saturday, December 15, 2012

Empty Nest--Day 2 of Holiday Giveaways

I just found this post that was supposed to have been posted last month so I'll share this today.

My owls are ready to leave the nest to their new homes today. (Already gone and enjoying their new homes.)


What do you think of this little one? (Actually--he's not so little, but don't you think its cute?)

This month's swaps (last month's swaps) are based on punches and this is what was born. Love the sparkle in its eyes! (Even though you can't really tell in this picture, I couldn't make something without a little bling!) If you want to try to make one of your own, here's how:

  • Fold 4-1/4" x 11" Card Stock in half to make (4-1/4" x 5-1/2" card).
  • Place the folded edge onto the Oval Accent Bigz die and cut out.
  • Cut out the wings from the Elegant Bird Bigz die and trim the wings as shown.
  • You'll need 2 of each Soft Suede 1-3/4" Circles and Whisper White 1-1/4" Circles for the eyes.
  • For the beak, you'll need to punch the More Mustard card stock with the Small Heart punch.
  • You'll need 6 of the 1-1/4" Scallop Circles. Cut them in half and place onto the "belly" of the owl.
  • Start at the bottom of the card and work your way up with the scallop circles making an upside down pyramid. Bottom layer: 1/2 a scallop. Next: 1/2 a scallop. Third: TWO1/2 scallops, Fourth: TWO1/2 scallops, Fifth: THREE1/2 scallops and Finally: the last THREE 1/2 scallops.
  • Place the Soft Suede Circles onto the card with Stampin' Dimensionals, slightly overlapping them
  • Place the heart at the bottom center of where the Soft Suede circles intersect.
  • Adhere the Whisper White circles onto the Soft Suede circles, covering the tops of the heart.
  • Place the glimmer brad onto the buttons and place them onto the card with glue dots.
  • Finally, place the wings onto the card with Stampin' Dimensionals. 
*Optional: for added depth, sponge the edges of the wings and Soft Suede circles with a coordinating ink.

{Project Details}


InLinkz.com
Day 2's free gift is the Owl Occasions Clear-Mount Stamp Set and the Owl Card.
Owl Occasions Clear-Mount Stamp Set
To participate in the random drawing, please leave a comment and/or book a party with me for next year. I will announce the winner in 48 hours. Good luck!


To order on-line 24/7 click here.