Showing posts with label MOJO. Show all posts

Friday, January 20, 2012

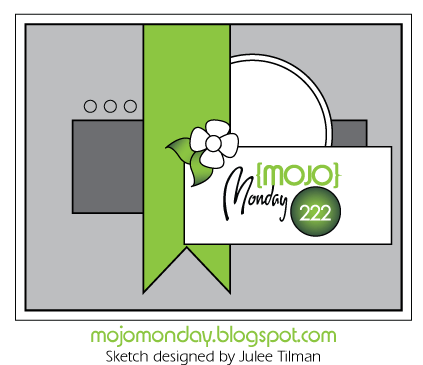
Mojo Sketch 222 & SAB Sneak Peek

The last Mojo sketch I participated in was somewhere in the 100's and its now sketch 222. WOW! I was intrigued by this sketch and thought it might be a good start for my Sudsol Leadership swaps. Sudsol stands for Stampin Up Demonstrators Sharing On-Line, a group of talented demonstrators who share ideas, projects, and business tips on-line. Since we are all over the country, I always enjoy my luncheons with them at Stampin' Up gatherings and love to put the faces to the names and projects I see on the internet.


I try to create cards for these ladies that they can easily duplicate, show a technique that may produce a "wow", and is asthetically pleasing.

Felt-like Flowers:
  • I punched the Pool Party Card Stock with the Blossoms Triple Layer Punch.
  • Then, distressed the flower by crinkling it up and rubbing the paper together. You'll start to see the paper splitting.
  • Next, pull the paper apart and now you'll have 2 flowers.
  • Finally, place it on top of each other with the "felted" sides up.
Banner:
  • The notch from the bottom to create the banner was made with the square punch.
  • Place one end of the card stock into the corner of the square punch, line corner to the center of the paper, and punch.
Coordinating Prints:
  • Its quite easy to do with Stampin' Up! Designer Series Paper because they have already done the color coordinating for you and placed them into a pack. However, there is a simple rule to follow when using different prints.
  • 1 Large print, 1 smaller print, and a solid coordinating color.
  • I usually pull my colors from one multi-color print and go from there.
Enjoy and thanks for stopping by!


To order on-line 24/7 click here.


Saturday, October 2, 2010

Greeting Card Kids


What do you get when you mix a Mojo Sketch and the adorable Greeting Card Kids Stamp Set?


 +


 =
For our Creative Souls group meeting, we usually have a swap and this is one that I made for each of the girls. It was so much fun to get my Blender Pen and Watercoloring groove on! Especially after a busy week of planning our school's Fall Festival, it was nice to get back to stamping. It was even easier to get into it with the sketch from Mojo Monday. Hope you enjoy my card and thanks for stopping by to take a peek!

{Project Details}
Stamp: Greeting Card Kids (119887-W/120633-C)
Ink: Black Staz-On Ink Pad; Basic Black, Blush Blossom, Crumb Cake, Chocolate Chip, Old Olive, Pumpkin Pie, and Rich Razzleberry Stampin' Write Markers.
Paper: Basic Black and Rich Razzleberry Card Stock, Watercolor Paper, and Wicked Fun Specialty Designer Paper.
Accessories: Blender Pens, Glimmer Brights Brads, and 1/2" Raven Lace Trim.

To order on-line 24/7 click here.

Thursday, September 10, 2009

Happy 100th Mojo (Day 4)


Continuing the celebration of Mojo Monday turning 100 weeks old, Sarah Bigelow shares her sketch. I decided it was time to bring out "Friends 24-7" stamp set {113218}. I like more of the whimsical and cutesy bird stamps versus the life-like images of birds so I never thought to purchase this set. Then I received some beautiful swaps with these images and had to get it. Unfortunately, I didn't use any of the main images in this sample but I did highlight the verses.


(click on picture to enlarge.)
  • Trim Chocolate Chip card stock to 3" x 4-1/4"
  • Wrap Chocolate Chip card stock with ribbon.
  • Adhere to Always Artichoke card
  • Trim another piece of Chocolate Chip card stock to 3" x 5".
  • Trim Very Vanilla card stock to 2-3/4" x 4-3/4". (On my card, the dimensions are not exact because I trimmed the card after I didn't stamp my frame directly in the center, which comes to my next point.)
  • Stamp the frame image in Chocolate Chip Classic Ink and stamp into the center of the Very Vanilla card stock. (TIP: If you want it to be EXACT, the help from the Stamp-A-Ma-Jig tool would be great for this step. If you don't want to use it, you can do what I did. If after the image is stamped and is not quite centered, trim the paper to make it look like you did!)
  • Stamp the frame image in Always Artichoke onto a scrap piece of Very Vanilla card stock.
  • Stamp the verse in Chocolate Chip classic ink and place onto the center of the Always Artichoke frame.
  • Using the 1-3/4" Circle Punch, trim the center of this piece out and layer onto the Chocolate Chip frame with Stampin' Dimensionals. (I just love how the punches coordinate so well with a myriad of stamp sets found in the Stampin' Up! catalog.)
  • Layer this onto the base card, stamp the other verse/sentiment in Chocolate Chip classic ink to the bottom corner, and you are all done!

{Project Details}
Stamp(s): Friends 24-7 (113218) and Gallery (113776)
Ink: Always Artichoke and Chocolate Chip Classic Stampin' Pad.
Paper:Always Artichoke, Chocolate Chip, and Very Vanilla Card Stock.
Accessories:Orchard Ribbon Originals and 1-3/4" Circle Punch.

Wednesday, September 9, 2009

Happy 100 Mojo Monday (Day 3)


Day Three of Mojo Monday's 100th Week Celebration (belated) continues with a sketch from Teresa Kline. Here is my creation using this sketch:


(Click on picture to view larger.)

I can't quite describe why I love this woodsy background paper from Autumn Meadows Designer Series Paper but I do! Its rustic but at the same time a little bit modern. I pulled the colors from this designer paper to add my colored card stock. Then added the Old Olive to pull the color from the peacock image from the Very Thankful stamp set {115338}, which part of its sales goes to the Ronald McDonald House Charity.

To get the colored effect of the peacock, stamp the image in the lightest color first. Then take your sponge dauber and sponge the areas you'd like to add the different colors. Repeat until satisfied and stamp onto the card stock. You'll always be surprised at what you get!


{Project Details}
Stamp(s): Very Thankful (115338)
Ink:
Brilliant Blue, Chocolate Chip, Old Olive, and Tempting Turquoise classic ink pad
Paper: Chocolate Chip, Old Olive, Tempting Turquoise, and Kraft card stock; Autumn Meadows Designer Series Paper.
Accessories: Scallop Edge Punch, Sponge, and Sponge Daubers.


Tuesday, September 8, 2009

Happy 100 Mojo Monday (Day 2)

Day Two of Mojo Monday's 100 Week celebration (belated) was created by Maria Gurnsey. I decided to use it for an elegant Christmas card. Make Merry!


I love the colors of red and brown together. The background paper is from the Christmas Cocoa Specialty Designer Series Paper. I don't think the picture does it justice. (Click on the picture for a larger viewing.) This paper is just velvety and exudes richness. I then incorporated the eyelet border punch to add a little bit more eye appeal. The center stage is taken by the Berry Christmas stamp set {116509}. Then to add more interest, I layered it with the Snowfall Printed Window Sheets. TIP: To adhere the printed window sheet, place your adhesive behind the design and it will become invisible. The delicious ribbon is from the new Mini Holiday catalog: Mistletoe. The perfect accent color to this merry card. Hope you enjoyed!


{Project Details}
Stamp(s): Berry Christmas (116509)
Ink: Real Red Classic Ink Pad; Chocolate Chip and Old
Olive Stampin' Markers.
Paper: Chocolate Chip, Real Red, and Whisper White card stock; Christmas Cocoa Specialty Designer Series Paper.
Accessories: Corner Rounder, Eyelet Border and Slot Punches; Mistletoe Originals Ribbon; Snowfall Printed Window Sheet.


Happy 100 Mojo Monday (Day 1)


A few weeks ago, Mojo Monday turned 100. To celebrate, the Mojo makers created a sketch for each day. Here is Day One. I found this sketch to be a challenge because the scallop circle element behind the rectangular center piece just threw me off. But I managed and like what I came up with.


(Click on picture for a larger view.)

As you can see, I deviated a bit from the sketch although fairly the same! For my focal point, I used the Charming stamp set {116519} from the Mini Holiday Catalog. Stamped the verses in Bravo Burgundy. Then using the Stamp Off Technique, inked the floral image with Old Olive, stamped it twice onto scratch paper (without re-inking), and then stamped a faint watermark like image onto Very Vanilla card stock. Finally, for the bottom scallop focal point, I decided to stamp a small medallion and place a button from the Sherbet Designer Buttons into the center.

I just love the Charming stamp set and FYI, it coordinates perfectly with Stampin' Up!'s new Simply Adorned line which will be available soon! To shop online for these products and limited edition stamps and accessories now available in the Mini Holiday Catalog, click here.

{Project Details}
Stamp(s): Charming (116519)
Ink: Bravo Burgundy and Old Olive Classic Stampin' Pad
Paper: Bravo Burgundy, Melon Mambo, and Very Vanilla Card Stock; Old Olive Patterns Designer Series Paper.
Accessories: Big Shot, Scallop #2 Die, and Sherbet Designer Buttons.


Wednesday, August 26, 2009

MOJO Monday Sketch 101


I can't believe that Mojo Monday is already 101 weeks old! To celebrate turning 100 last week, they provided a sketch for every day of the week. I will be sharing my creations with you later on this week. But today, I'll focus on this lovely square card sketch. What do you think?


I haven't created very manly cards, but I can do them! Here's one that I did for my father-in-law's birthday. To re-create this card:
  • Start with a 5" x 10" Very Vanilla card stock and fold in half.
  • Trim a piece of 4-3/4" x 4-3/4" Sage Shadow card stock and lay aside.
  • Trim out one 3" x 3-1/2" and one 2" x 3-1/2" of "To the Nines" Designer Series Paper. Layer these onto the Sage Shadow leaving a nice even border around the designer paper.
  • Wrap one end of the 5/8" Chocolate Chip grosgrain ribbon (5" long) behind the Sage Shadow card stock and trim the other end.
  • Layer this piece onto the Very Vanilla base.
  • Cut 2-1/2" x 2-3/4" Chocolate Chip card stock, 2-3/4" x 3-1/4" Sage Shadow card stock, and 3" x 3-1/2" Very Vanilla card stock .
  • Layer these onto each other and adhere the the Very Vanilla card stock onto the base card with Stampin' Dimensionals.
  • Using the Central Park stamp set {113732}, stamp the image in Chocolate Chip classic ink pad onto Very Vanilla card stock. Clean and then stamp again using Sage Shadow classic ink pad but slightly askewed for a shadow effect. (Central Park stamp set is a dormant set so it is not shown in the main Idea Book and Catalog BUT is still available for purchase.)
  • Cut the image out with the 1-3/4" circle punch and adhere to card with Stampin' Dimensional.
  • Don't forget the sentiment! Using the great Teeny Tiny Wishes stamp set (115370), stamp "Happy Birthday" (or whatever sentiment you want) with Chocolate Chip classic ink onto Very Vanilla card stock and trim out. Adhere to card and there you have it.
{Project Details}
Stamp(s): Central Park and Teeny Tiny Wishes
Ink: Chocolate Chip and Sage Shadow Classic Ink Pads
Paper: Chocolate Chip, Sage Shadow, and Very Vanilla Card Stock; To the Nines Designer Series Paper.
Accessories: 5/8" Chocolate Chip Grosgrain Ribbon and 1-3/4" Circle Punch.

Tuesday, August 4, 2009

Mojo 98 Challenge


The beginning of August and a new Mojo Sketch = Mojo Madness!!! Every first Monday of the month, the ladies from Mojo Monday host a sketch contest. They provide the sketch and you create something marvelous with that sketch. This is what I chose to make.


(Card #1)

I think everything on this card makes it feel luxurious and chic. To start, I ran the Chocolate Chip Patterns Designer Paper through the Big Shot using the small polka dot textured plate. Then, I sanded the dots to reveal the white base underneath. Trimmed the paper to 4" x 4" and adhered to the base card. Next, I layered with Kraft card stock (3-1/2"x 3-1/2") and adorned the corners with half pearls from the Pretties Kit. Using the Big Shot and the Scallop Circles #2 Die, I cut the larger scallop from Chocolate Chip card stock. With my 1/16" circle punch, I punched the center of each scallop to add more dimension. For my stamp, I used the "Chic Boutique" stamp set (113744). Inked the dress form image in Chocolate Chip classic ink and stamped onto Very Vanilla card stock (already cut into a 3" circle). I then stamped the same dress form image onto the retired Raspberry Tart Designer Series Paper, trimmed, and then adhered to the stamped image on the Very Vanilla card stock. Next, I stamped the "merci" verse onto a scrap piece of Very Vanilla card stock, layered onto a scrap piece of Chocolate Chip card stock, and trimmed. For the final touch, I added the wide striped Chocolate Chip ribbon and adorned the center with a Chocolate Chip corduroy button.

(Card #2)

This is another version of the Mojo card that I made for the Late Night Stampers Group. Their challenge was providing a Monochromatic Color Challenge. Therefore, I colored the dress form with a blender pen and Chocolate Chip classic ink. I then stamped some scrolls using a stamp from the "Framed with Love" (114389) stamp set with the help of reverse masking. I think both cards came out beautifully and just love them all! Hope you do too!


{Project Details}
Stamp: Chic Boutique and Framed with Love
Ink: Chocolate Chip Classic Ink Pad
Paper: Chocolate Chip and Very Vanilla card stock; Chocolate Chip Patterns and Raspberry Tart Designer Series Paper.
Accessories: 1/16" Circle Punch, Circle Scissor Plus, Big Shot, Scallop Circles #2 Die, Backgrounds 1 Texturz Plates, Pretties Kit, 1-1/4" Striped Chocolate Chip Grosgrain Ribbon, and Chocolate Chip corduroy buttons.


Sunday, May 17, 2009

Bird on a Branch


It's another week with another great MOJO Monday Sketch. I  finally got around to making my card for this sketch and got to use my newly purchased "Bird on a Branch" (113266) stamp set. Although I love birds, I wasn't quite convinced that I was in love with this bird image. But in the end, I reconsidered and now am so happy that I did.
I used Cameo Coral and Chocolate Chip cardstock to layer on top of the Chocolate Chip Patterns Designer Paper. (Stampin' Up! is having a special...buy 3 Designer Series Paper or 12"x12" Textured Paper or any combination of both and receive a 4th one FREE.) 
Stamped my branch with Chocolate Chip Classic Ink onto Whisper White card stock. Stamped the flowers with Cameo Coral Classic Ink onto the branches and then trimmed my paper into thirds (leaving my middle a little bit larger so it would stand out more). Layered those pieces onto Cameo Coral card stock to pop those images even more and attached to the card with Stampin' Dimensionals. For the final touch, I stamped the bird in Ruby Red Classic Ink onto Whisper White card stock, trimmed it, and attached with Stampin' Dimensionals. Its another easy yet beautiful card. Thanks for looking.


Sunday, May 3, 2009

Welcome Little Cutie

I have finally gotten around to this past Monday's Sketch challenge. Mojo 84 is the card that I will be giving to my husband's colleague who just had a baby boy! First babies are so special, aren't they? So small and so new, you just don't know what to do with all the excitement. That is how I feel about this card. I just wish I could squeeze it . . . so cute!


I love the artwork from the "Animal Crackers" stamp set (113395). I also love the versatility of the stamp set. It comes with short phrases with each character but I omitted the verse that comes with this birdie. By using a Chocolate Chip Stampin' Up Marker and coloring on the little bird image, I was able to stamp only the image that I wanted onto my Whisper White card stock. Then, I used phrases from the "Nursery Necessities" stamp set (113506). 


Using the small floral buttons from the Button Bouquet, I adorned the sides of my focus trying to tie in with the Kiwi Kiss background. Colored in the birdie with "Barely Banana" Stampin' Up! Marker and went over the edges for a more highlighted image. The beak was colored in using "Apricot Appeal" Stampin' Up! Marker.


Unfortunately, you can't tell in this picture very well that the brown with white polka dots is a textured paper. I have been playing around with the Big Shot and the Texturz Plates. I saw a great idea from Patty Bennett. Please click on her name for a link to her blog. I decided to show you a few pictures on how to achieve the look on on the plain side of "Chocolate Chip" designer series paper. 


Using the small polka dot Texturz pattern and my handy, dandy Big Shot, I ran my "Chocolate Chip" Designer Series Paper through to get this embossed look. (TIP: Use an extra cardstock underneath the texturz plate as a shim to get a deeper embossed look.)


Then, you can sand the raised image with the sanding block to highlight the embossed pattern.
(TIP: Using a plain paper helps the sanded image pop and a light touch is all you need.)


Finally, I punched out a scallop circle to place my extra sentiment on. Hope you'll become a fan of the Texturz Plates like I have!


Tuesday, April 28, 2009

Rockabilly Specialty Thank You Card


My brain has been working on trying to come up with different ideas for BBQ party favors so the color scheme I have had on my mind is the classic of Red, White, and Black.  I also love the cherry print from Rockabilly Specialty Designer Series Paper; therefore, I wanted to use that in this card sketch, which works perfectly with my color scheme.


I used Loop to Loop rub-ons from the Hostess Level 3 set (Hand Drawn Bundle) as my sentiment on the scalloped punched trim. Then, I used my favorite die machine, the Big Shot by Sizzix, and the Scallop Envelope Die for my focus. I folded the flap backwards to leave a "pocket" for the additional surprise note.


Can't leave a card without some sparkle so I added a gemstone (sorry not Stampin' Up!) to make it look like a clutch. Added a jumbo eyelet and threaded Riding Hood Red Taffeta Ribbon through  for my accent and pull for the surprise note. I had fun with the MOJO 83 sketch challenge. 


Thursday, April 23, 2009

Great Friend


Splitcoaststampers post daily challenges. Monday is techniques & scrapbook inspiration. Tuesdays is color challenges. Wednesdays is sketch challenge. (And so on and so on.) The color challenge I chose to do was to create a card using Pink Passion, Chocolate Chip, and Kiwi Kiss (colors from Stampin' Up). I love Kiwi Kiss and it seems to be a favorite of a lot of others too! I also combined this color combination with MOJO 82 sketch challenge. Pink Passion is definitely a bright pink. It gives the card that pop!


To make this card, you'll need:
Great Friend Stamp Set (113792)
Chocolate Chip Classic Ink Pad
8 1/2" x 5 1/2" Chocolate Chip Cardstock
3 7/8" x 5 1/4" Pink Passion Cardstock
3 1/2" x 5" Kiwi Kiss Cardstock
TWO 2" x 2" squares of Chocolate Chip Cardstock
1 7/8" x 1 7/8" square of Whisper White Cardstock
1 7/8" x 1 7/8" square of Raspberry Tart Designer Series Paper
2 1/2" x 2 1/2" square of Raspberry Tart Designer Series Paper
3" x 3" square of Raspberry Tart Designer Series Paper
4 1/2" of Chocolate Chip 5/8" Grosgrain Ribbon
Pink Passion Stampin' Up Marker
Pretties Kit (3 white half pearls)
Stampin' Dimensinals
Scallop Edge Punch
Bigz Beautiful Butterflies Die
Texturz Plates (Stampin' Up! Backgrounds 1)
Big Shot


1. Score the 8 1/2" x 5 1/2" Chocolate Chip card at 4 1/4" and fold at the score line. You should have the base of your card at 4 1/4" x 5 1/2". 

2. Place the Kiwi Kiss Cardstock onto the Texturz Plates and run through the Big Shot Machine. (I used the large polka dots but you can certainly use what ever you'd like.)

3. Punch the bottom edge of the Kiwi Kiss Cardstock with the Scallop Edge Punch.

4. Next, wrap the Chocolate Chip Grosgrain Ribbon around the cardstock near the scalloped edge with the edges on the back side of the cardstock.

5. Trim the bottom of the Pink Passion Cardstock with the scallop edge punch and layer the Kiwi Kiss onto it.

6. Layer onto one of the 2" Chocolate Chip square pieces with a 1 7/8" square of the Raspberry Tart Designer Series Paper. Adhere finished product to the top center of the card with a corner facing the top.

7. Ink the sentiment with Chocolate Chip Classic Ink and stamp onto the 1 7/8" Whisper White Square and using the Pink Passion Marker, place stitches on the perimeter of the square.

8. Layer onto the remaining 2" Chocolate Chip square with the 1 7/8" Whisper White cardstock and layer the finished product onto the card overlapping the Chocolate Chip square with the Raspberry Tart Designer Series Paper.

9. Fold the 3" Raspberry Tart Designer Series Paper in half and place onto the medium sized butterfly die and place the 2" square onto the small butterfly. Run through the Big Shot Machine.

10. Place the larger butterfly onto the left hand side of the card with Stampin' Dimensionals.

11. Place adhesive to the center "body" of the small butterfly and adhere to the large butterfly. Fold the wings upward to give it more dimension.

12. Using the Pretties Kit, place three half pearls onto the center of the butterfly with glue dots.

(TIP: If you don't have the Big Shot, you can use the Kiwi Kiss cardstock as is without the texturz plates and you can use the butterfly stamp from the Great Friend Set and cut by hand instead of using the Bigz Beautiful Butterflies die.)